

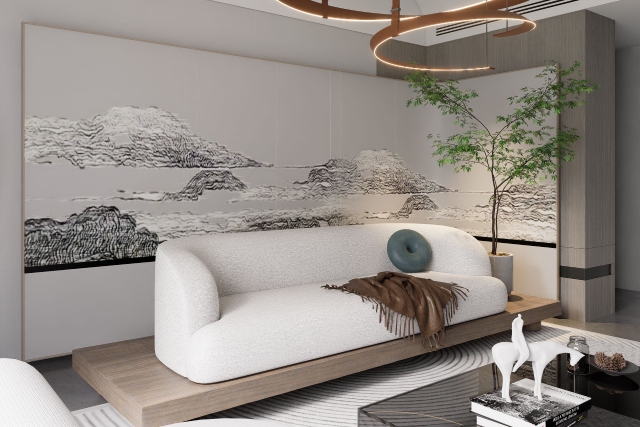

If you’ve started looking into renovating your home in Singapore, chances are you’ve already come across the term “3D rendering” more times than you can count. Virtually every interior design firm now offers it, every renovation blog swears by it, and your friends who’ve just finished their BTO probably showed you theirs on Instagram. But here’s the thing: most homeowners treat renderings as a nice-to-have photo they get to approve or reject, when really, they’re one of the most useful tools you have in your interior design project planning, budgeting and even negotiating your entire renovation.
Read on as we go over when you actually need renderings, what they’re good for, the mistakes that trip most homeowners up, and a few tricks that can genuinely save you money.
When Do You Actually Need a 3D Rendering for Your Renovation?
Homeowners should get renders before they commit to anything permanent, ideally after their space plan is locked, before quotations are finalised, and definitely before any hacking or carpentry begins.
The exact timing looks a little different depending on your housing type. If you’re a BTO owner, renderings are especially handy because you often can’t physically access your unit until much closer to key collection, so a rendering becomes your only real way of previewing the finished space beforehand. If you’re a resale flat or condo owner, you’re usually in a slightly different boat since you can walk the actual space. In this case, the value of a rendering kicks in once you’re about to commit to built-in carpentry since altering cabinetry or fixed elements after installation is expensive and slow to undo. Landed property owners, meanwhile, tend to need renderings earlier in the process, particularly if the renovation involves any structural or extension work that needs to be checked against planning guidelines.
One thing worth clearing up early: a rendering is not the same as the technical drawings required for HDB approval. HDB submissions call for proper floor plans, elevation drawings and specifications, and renderings sit outside that process entirely. They’re there to help homeowners make confident design decisions, not to satisfy a regulator. Knowing this distinction upfront saves a lot of confusion (and the occasional awkward conversation) further down the line.
The broader principle to remember is that changes caught during a 3D review cost you next to nothing. The same changes caught after construction has started can cost anywhere from a few hundred to tens of thousands of dollars, depending on which trade is affected. That gap alone is reason enough to take the rendering stage seriously rather than rushing through it.
What Can 3D Renderings Actually Be Used For?
Renderings aren’t a one-size-fits-all tool. What you should be asking your designer for and how detailed it needs to be depends heavily on the scope of your project.
Renovating a Single Room? Here’s What To Render
For interior remodels like a kitchen, bathroom or bedroom, renderings are mostly about confirming fit and flow. Does the furniture actually fit the way you imagined? Is there enough walking space around the bed, sofa or dining table? Do wardrobe, toilet or bedroom door swings clash with anything? These are the sorts of practical checks that are far easier to catch in a rendering than on a flat floor plan, where it’s genuinely difficult to judge scale and clearance just by looking at lines on paper.
Adding or Changing Something Outside Your Home
Exterior additions and changes like landed property extensions, new facades, or gate and driveway alterations carry a bit more weight than interior renders. Beyond helping you visualise the finished look, these renderings are often used to confirm that the proposed changes align with planning and building guidelines before work starts. In other words, exterior renders are doing double duty: aesthetic preview and technical sanity check, rolled into one.
Reconfiguring Your Whole Floor Plan
If you’re knocking down walls, opening up your kitchen to the living area, or generally rethinking how rooms connect, static renderings only tell you part of the story. This is where it’s worth asking for a 3D walkthrough or animated video instead of, or in addition to, still images. Walkthroughs reveal how one space transitions into the next — how the entrance leads into the living area, how the kitchen connects to the dining zone — in a way that a handful of static images simply can’t capture. If your project is fundamentally about flow, ask for something that shows flow.
Planning a Full Home Renovation From Scratch
For a whole-home renovation, renderings become more about coordination. You’re essentially using them to keep every room, every trade and every decision aligned at the same time, which matters because the number of moving parts (and the number of things that could go wrong) is at its highest here. This is also where the cost of skipping the review process is steepest, simply because there’s more surface area for something to be missed.
Common Mistakes Homeowners Make When Asking For Renders
Here’s an uncomfortable truth: most disappointing rendering experiences come down to what the homeowner didn’t provide or didn’t decide, not the studio’s skill.
- Not knowing what to ask for. Briefs like “just make it look nice” or “something modern” give a rendering studio almost nothing to work with. The more specific you can be about mood, materials and must-haves, the closer the first draft will land to what you actually want.
- Providing too little design information. Missing dimensions, no reference photos, an undecided material palette, and more are all issues that force the studio to guess, and guesses rarely match what’s in your head. If you’ve got Pinterest boards, screenshots, or even photos of a friend’s home you liked, send them over.
- Expecting the studio to make decisions that should be yours first. Renderings are meant to visualise decisions rather than make them. Layout, function and budget tier need to be settled at least roughly before you ask for a rendering, otherwise you’ll end up paying for revision after revision as the fundamentals keep shifting underneath the visuals.
- Ignoring the “boring” details. It’s easy to get swept up in admiring the finish and forget to check for outlets, switches, vents and radiators. These unglamorous elements are exactly the sort of thing that gets missed in render approvals, and they’re a lot more annoying to fix once tiling or carpentry is done.
- Rushing the review process. Some homeowners are so eager to get started that they skim past the rendering stage entirely. Given that this is your cheapest opportunity to catch a mistake, it’s worth resisting the urge to rush.
Things To Keep In Mind Before Requesting Your Renders
1. Lock your layout first. Use renders to confirm a plan instead of deciding on one. Going back and forth on layout at the rendering stage gets expensive in revisions.
2. Bring references, not just descriptions. A handful of saved images will get you further than a paragraph of adjectives.
3. Give exact dimensions and site photos. The more accurate your input, the more accurate (and useful) the output.
4. Be specific about materials and finishes you’re leaning towards. Leave the truly open questions for a later revision round, not the first draft.
5. Ask for the unglamorous details to be shown. Sockets, switches and vents included, please.
6. Agree on a revision budget upfront. Ask your designer how many rounds of changes are included so that there are no surprises.
7. Mentally walk through your daily routine in the render. Cooking, laundry, getting ready in the morning, having guests over — does the space actually work for how you live?
8. Double-check lighting separately. Your home’s actual lighting conditions will undoubtedly differ from the bright and airy atmosphere of a render on a screen, so confirm your lighting plan on its own terms.
9. Treat sign-off as a real checkpoint rather than a formality. Once you approve, changes get pricier. Thus, it’s important to take your time here, even if it means a short delay.
How To Get More Value Out Of Your Renders
Beyond simply approving a design, renderings can be used a lot more strategically. Here are a few ways savvy homeowners squeeze extra value out of them.
Use renders to get genuinely comparable contractor bids. This is one of the most underused tricks out there. Instead of sending contractors a floor plan and a rough description, send drawings plus a set of renders that show exactly what the finished project should look like. When three contractors are quoting against the same unambiguous visual reference rather than their own interpretation of your brief, their bids tend to converge because there’s simply less room for them to price differently based on assumptions. You end up comparing like for like, which makes your decision (and your negotiating position) a lot clearer.
Keep renders on hand as a reference during the build. When questions come up on-site (and they always do) having an agreed rendering to point to can settle disagreements quickly and far better than relying on memory or a verbal understanding from weeks earlier.
Use renders to sequence your big-ticket purchases. Confirming furniture and fixture scale in a rendering before you buy can save you from the classic mistake of a sofa or wardrobe that looked fine online but doesn’t actually fit.
Spring for a walkthrough on complex projects. If you’re doing a whole-floor reconfiguration or a full-home renovation, the extra cost of an animated walkthrough is usually well spent, simply because static images struggle to communicate how spaces flow into one another.
Bringing Your Dream Reno To Life, One Render At a Time
At the end of the day, a 3D rendering is only as useful as the effort you put into briefing it properly and the decisions you make before requesting it. Get your layout sorted, come prepared with references and dimensions, and treat the review stage as your cheapest form of insurance against costly surprises down the line. Do that, and renderings stop being just a pretty picture — they become one of the smartest tools in your entire renovation toolkit, from nailing down your design to getting fairer, more comparable contractor quotes.
If you’re planning a renovation and want a design team that treats renderings as part of a genuine planning process rather than an afterthought, get in touch with us — we’d love to help bring your space to life before a single wall comes down.
Frequently Asked Questions
1. Do I need a 3D rendering for a small renovation, like just redoing one bathroom?
It’s not essential, but it’s still worth it. Even a single room involves plenty of decisions around layout, fittings and finishes, and a rendering helps you catch fit and clearance issues before tiling or carpentry begins.
2. Are 3D renderings the same as the drawings needed for HDB approval?
No. HDB submissions require technical drawings, floor plans and specifications, which are separate documents entirely. Renderings are a design tool for you and your designer, not part of the regulatory approval process.
3. How many rounds of revisions should I expect with a rendering?
This varies between studios, so it’s best to ask upfront. Agreeing on a set number of revisions before you start avoids awkward conversations (or unexpected charges) later on.
4. Can I use renderings to compare quotes from different contractors?
Yes, and it’s one of the smartest ways to use them. Sharing the same drawings and renders with a few contractors means they’re all pricing an identical, clearly defined scope, which tends to bring their quotes much closer together and makes comparing them far easier.
5. Why does my rendering look brighter than my actual home?
Renderings simulate lighting conditions, but they don’t always reflect your home’s real-world light — orientation, time of day and window placement all play a part. It’s worth confirming your lighting plan separately rather than relying on the render alone.
6. What information should I prepare before asking for a rendering?
At a minimum: accurate measurements, photos of the existing space, and a rough idea of your material and colour preferences. Reference images help enormously too — the more concrete information you provide, the closer the first draft will be to what you actually have in mind.