

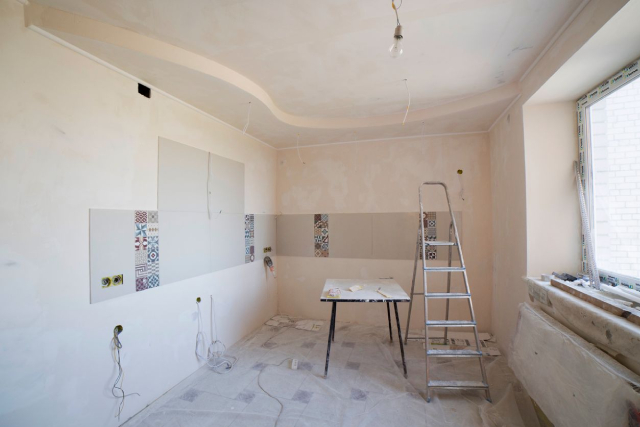

Collecting the keys to your new BTO is a milestone you’ve probably counted down to for years. But before you get swept up in the excitement of getting started with renovation planning, there’s one unglamorous yet essential task that needs to be done first: checking your new flat for defects.
It’s not as fun as diving into the details of what improvements you want to make, but skipping it will most likely cost you dearly later. This is because once renovation work begins, it’s much harder to prove a crack, leak, or hollow tile was there from the start rather than caused by your contractor. And once you’re past your warranty window, you’re footing the bill yourself. A proper defect check is anything but complicated, and it only takes patience, a bit of method, and the right tools. Here’s exactly how to go about it.
Why Bother Checking Before You Renovate?
Every new HDB flat comes with a one-year Defects Liability Period (DLP) starting from the day you collect your keys. During this window, genuine workmanship defects are fixed by HDB’s contractor at no cost to you. Miss this window, or bury the defect under a fresh coat of paint and new flooring, and that free fix is gone for good.
It’s worth taking seriously, too. Ceiling collapses, popped tiles, and leaking pipes aren’t just theoretical worst-case scenarios since they’ve genuinely happened to BTO owners who moved straight into renovation without checking first. A hollow tile that seems harmless today can pop weeks later once foot traffic and humidity get to it, and by then, you’d be paying out of pocket to have it re-laid. A thorough check now essentially buys you insurance against these headaches, and it costs nothing but a free weekend.
When Should You Do the Defects Check?
Homeowners should ideally start evaluating their flat as soon as they get the keys and well before anyone starts drilling, hacking, or laying flooring. This isn’t a task to put off for later because HDB works on a fairly tight window for you to submit your defects list, and as mentioned, it gets progressively harder to convince anyone a defect was original once renovation work has started around it.
That said, don’t panic if you spot something after you’ve moved further along; your one-year DLP still applies to defects that surface later, such as ceiling leaks or seepage that only show up after a good storm. The key takeaway is simple: inspect early, inspect thoroughly, and don’t let renovation excitement rush you past this step. It’s worth double-checking the exact reporting deadline on HDB’s website, as this detail can vary slightly depending on your project.
What You’ll Need for the Inspection
You don’t need anything fancy as you probably already have most of what’s required at home:
- A printed or digital checklist to keep yourself organised
- A marble or coin (for the classic hollow-tile test)
- A torchlight for dim corners
- A small mirror to peek behind fixtures and into tight spaces
- A spirit level
- Masking tape to flag problem spots as you go
- Your phone, for photos and notes
The marble test is a simple but genuinely useful trick: drop it onto your tiled floor and listen for a hollow, rattling sound rather than a solid thud. That hollow sound usually means the tile wasn’t properly bonded and could pop or crack later. A small mirror also comes in handy for checking behind toilet bowls and sinks where concealed pipework tends to hide.
One tip that’s easy to overlook: inspect your flat at different times of day, ideally both daytime and evening, as some issues like inconsistent water pressure or lighting glitches only reveal themselves under certain conditions.
Give Your Walls, Floors and Ceilings a Proper Once-Over
The walls, ceiling, and floors are the big surfaces you’ll be living with every day, so they deserve your closest attention. For walls, run your eyes and hands across every surface and look out for cracks, uneven patches, or areas that sound hollow when tapped. For flooring, the approach depends on what you’ve got: parquet should be checked for level and noticeable scratches or chips, while tiled areas should be tested with your marble or a tapping rod to catch any hollow spots before they become a problem.
Ceilings deserve just as much scrutiny, even if they’re harder to inspect from below. Look for hairline cracks, sagging, or discolouration that might hint at a leak above. This isn’t an area to skip—there have been real cases of false ceilings collapsing under their own weight. It’s a rare occurrence, but a good reminder that turning your attention upward is worth your time.
Test Every Door, Window and Fitting
This part is more hands-on and kind of satisfying once you get into the rhythm of it. Open and close every door and window in the flat and be sure to verify that they align properly, don’t stick, and close flush without gaps. Check window locks and grilles too, especially if you’ve got young children or pets. From there, move on to the fittings and give water faucets, electrical sockets, and switch covers a gentle tug to make sure they’re securely installed and not just sitting loosely in place. It sounds like a small thing, but a wobbly socket cover today can turn into a bigger electrical issue once it’s hidden behind new furniture.
Don’t Skip the Plumbing and Electrical Checks
Water and electricity are the two things you really don’t want to discover problems with after your renovation is done, so give this section the time it deserves.
Run every tap and check water pressure and drainage speed; water that pools or drains sluggishly could point to a plumbing issue worth flagging early. Also, flush the toilets several times to check for leaks around the base. On the electrical side, test every switch and socket to confirm they’re working, and keep an eye out for any flickering, sparking, or unusual sounds. Problems like seepage through bathroom tiles or unresponsive outlets can definitely still occur even with increasingly stringent quality checks by contractors, and they’re exactly the kind of thing this inspection is meant to catch before they’re concealed behind new tiling or built-in cabinetry.
How to Report Defects to HDB
In the event that you find something off, don’t fret. For starters, document each defect you discover as clearly as possible: take a well-lit photo, jot down a short description, and note its location in the flat. Once you’ve compiled your list, submit it through the appropriate channel, typically your estate’s Building Service Centre (BSC). A BSC officer will usually arrange a joint inspection to verify each item on-site before rectification begins.
The reassuring part is that genuine workmanship defects reported within your DLP are fixed by HDB’s contractor entirely free of charge. Most rectification work is completed within about two weeks, though this can take longer if materials need to be sourced. Keep copies of everything you submit, just in case there’s ever a need to follow up.
Is It Worth Hiring a Professional Inspector?
Hiring a professional inspector is certainly not essential, but it can be a helpful option depending on your comfort level. There’s no legal requirement to bring in a professional as plenty of homeowners complete their defects check themselves. That said, if you’d rather have a second, trained pair of eyes (or you’re simply too busy to dedicate a full day to it), professional inspection services are available, generally ranging from around $100 to $300 for a basic visual check, up to $400 to $600 for more comprehensive packages that include thermal imaging and moisture detection.
If you ever decide on this route, it’s worth asking for sample reports and checking reviews beforehand since thoroughness can vary quite a bit between providers. And if you’re already planning your renovation with a design firm, don’t forget to ask whether they offer support or guidance during this stage too—an extra pair of experienced eyes rarely hurts.
Wrapping Up: Start Renovation on Solid Ground
A defects check might not be the most thrilling part of getting your BTO keys, but it’s arguably one of the most important. It protects your warranty, saves you from expensive surprises down the road, and means your renovation starts on a flat that’s genuinely ready for it, not one with hidden issues quietly waiting to resurface.
Take your time, work through it room by room, and don’t be shy about flagging anything that looks even slightly off. Once your defects are sorted and signed off, you’re free to move forward with your renovation plans with full peace of mind. And if you’d like an experienced team to walk through your flat with you or simply want guidance on what comes next, feel free to reach out to us and we’ll help you start your renovation journey on the right foot.
Frequently Asked Questions
1. How long do I have to report defects to HDB after collecting my keys?
HDB generally advises submitting your defects list soon after key collection and before renovation begins, though the exact window can vary by project. It’s best to check the latest guidelines on HDB’s official website to confirm the current timeframe for your flat.
2. What is the Defects Liability Period (DLP), and how long does it last?
The DLP is a one-year warranty period from your key collection date, during which HDB’s contractor will rectify genuine workmanship defects at no cost to you. Some issues, like ceiling leaks in wet areas or wall seepage, may be covered for even longer under separate warranty provisions.
3. Can I still renovate if I haven’t finished checking for defects yet?
It’s best to hold off. Starting renovation work before your inspection is complete makes it much harder to prove that any defect existed before construction work began, which could mean losing your right to a free fix.
4. Do I need special tools to check for defects myself?
Not really — a torchlight, a coin or marble, a spirit level, and your phone camera will cover most of what you need. The marble test, in particular, is a simple way to detect hollow tiles that might otherwise go unnoticed.
5. What happens after I submit my defects list to HDB?
A Building Service Centre (BSC) officer will typically arrange a joint on-site inspection to verify each defect you’ve flagged. Once confirmed, rectification work is usually completed within about two weeks, though more complex fixes may take longer.
6. Should I hire a professional to inspect my flat instead of doing it myself?
It isn’t compulsory, and many homeowners manage perfectly well with a systematic DIY checklist. However, if you’d prefer an experienced second opinion or simply don’t have the time, professional inspection services are available at a range of price points depending on how detailed you’d like the check to be.